Flooring Installation Near Me Your Guide
Flooring installation near me is a crucial decision. Choosing the right flooring and installer can significantly impact your home’s aesthetic and longevity. From hardwood to laminate to tile, various options exist, each with unique characteristics and installation requirements. This guide provides a comprehensive overview, helping you navigate the process and make informed choices.
This guide covers everything from finding reputable installers in your area to understanding different flooring types and their installation procedures. We’ll also discuss crucial pre-installation considerations, the installation process itself, and essential post-installation care. It’s designed to empower you with the knowledge needed for a smooth and successful flooring project.
Introduction to Flooring Installation Services

Source: floorstouch.com
Flooring installation is a crucial aspect of home improvement, significantly impacting a space’s aesthetics and durability. From adding a touch of elegance to enhancing the overall value of your property, the right flooring can transform a room. This involves more than just laying down tiles or planks; it’s a meticulous process demanding expertise and the right materials.
Flooring installation services encompass a wide range of options, from classic hardwood to trendy laminate and stylish tile. Each type requires specialized knowledge and tools for proper installation. Understanding the nuances of each type and the installation process is key to a successful outcome.
Types of Flooring
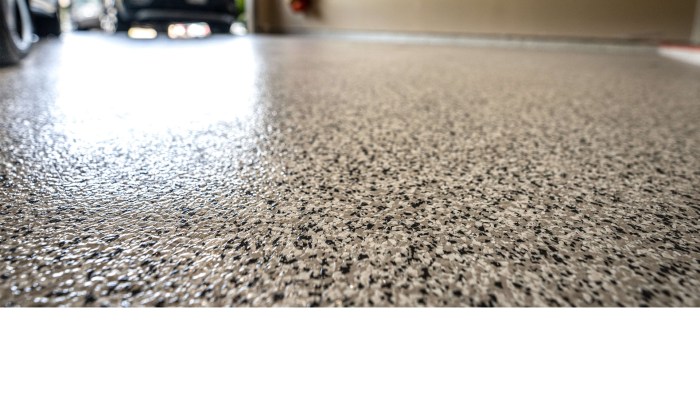
Various types of flooring offer different aesthetics, durability, and maintenance requirements. Knowing the pros and cons of each can help you make an informed decision. Hardwood, known for its timeless beauty and warmth, is a popular choice. Laminate, an affordable alternative, mimics the look of hardwood but is more resistant to scratches and water. Tile, available in numerous colors and patterns, provides a stylish and low-maintenance solution, ideal for kitchens and bathrooms. Vinyl flooring offers a durable and waterproof option that’s often a great value.
Steps in a Flooring Installation Project
A professional flooring installation typically follows these steps:
- Assessment and Planning: The installer will measure the area, assess the subfloor, and discuss the client’s preferences, ensuring proper planning for the job. This step includes checking for any existing damage, uneven surfaces, or obstacles that might hinder the installation process. This is vital for preventing issues down the line.
- Preparation: The subfloor needs to be properly prepared for the flooring material. This includes leveling, repairing, and cleaning the existing surface. Any loose debris or irregularities must be addressed to ensure a stable foundation for the new flooring. This crucial step significantly impacts the longevity and aesthetic appeal of the final product.
- Installation: This stage involves the actual laying of the flooring material, meticulously following the manufacturer’s instructions and ensuring proper alignment and spacing. The installer will use specialized tools and techniques to achieve a seamless finish. This phase requires precision and adherence to the chosen flooring’s installation guidelines.
- Finishing Touches: This encompasses trimming, sealing, and completing the final touches. Proper finishing guarantees a professional and appealing result. This often includes ensuring proper transitions between different flooring sections.
Importance of Hiring a Professional Installer
Hiring a professional installer offers numerous advantages over DIY attempts. Professionals possess the necessary expertise and tools for precise and efficient installation, reducing the risk of costly errors and ensuring a long-lasting result.
- Expertise and Experience: Professional installers are trained to handle various flooring types and installation techniques. Their expertise ensures proper installation and avoids common pitfalls.
- Quality Materials and Tools: Professionals often have access to high-quality materials and specialized tools, which lead to superior results.
- Warranty and Support: Many professional installation services provide warranties on their work, offering peace of mind and support in case of future issues.
- Time Savings: Professional installation often takes less time compared to a DIY approach, saving you time and effort.
Common Flooring Installation Problems and Solutions
Flooring installation can sometimes encounter issues. Knowing potential problems and solutions can help you prepare.
- Uneven Subfloor: An uneven subfloor can lead to gaps, bumps, and an overall unsightly finish. The solution is to properly level the subfloor before installation. This might involve patching, sanding, or using specialized leveling compounds.
- Improper Material Selection: Choosing the wrong type of flooring for a specific environment can result in damage or premature wear. Selecting the appropriate flooring for the room’s usage and lifestyle is essential. This includes considering factors like moisture resistance, durability, and aesthetic preferences.
- Installation Errors: Mistakes during installation can lead to gaps, misalignments, and other imperfections. Carefully inspecting the installation process is vital to prevent these errors.
Finding Local Flooring Installers

Source: spdc.net
Finding the right flooring installer is crucial for a successful project. A qualified and reliable installer can ensure your floors are installed correctly, maximizing longevity and minimizing future problems. Poor installation can lead to costly repairs or even necessitate complete replacement. This section details effective strategies for finding and vetting local installers.
Methods for Finding Installers
Choosing the right approach for finding a flooring installer can save you time and effort. Various avenues are available, each with its strengths and weaknesses.
| Method | Pros | Cons |
|---|---|---|
| Online Directories (e.g., Yelp, HomeAdvisor) | Wide reach, easy comparison of installers, often includes customer reviews. | Reviews might not always be accurate or recent; some directories may not vet installers thoroughly. |
| Referrals (from friends, family, neighbors) | Trusted recommendations, often from people you know and trust, and potential for personalized insight. | Limited scope; you might not find a suitable installer for your needs. |
| Local Ads (e.g., newspapers, community bulletin boards) | Potentially lower cost, direct contact with installers, and might find specialized installers. | Less visibility, less information about installers, potentially less transparency. |
Essential Information to Look for in Installers
Selecting a reputable installer involves careful consideration of their qualifications and experience. This ensures you’re partnering with someone capable of handling the job.
| Criteria | Explanation |
|---|---|
| Licenses and Insurance | Verify licenses and insurance to ensure they are legally permitted to work in your area and are insured against potential accidents or damages during installation. |
| Experience | Assess the installer’s experience level with various flooring types. Look for a history of completing similar projects. |
| Portfolio or Testimonials | Review past projects, if available. Testimonials from previous customers can offer valuable insights into their work quality and professionalism. |
| Reputation | Research the installer’s reputation. Online reviews and feedback from past clients can provide crucial information. |
Questions to Ask Potential Installers
Thorough questioning can help you gauge an installer’s capabilities and commitment to quality work.
- Project Timeline: Inquire about their estimated timeline for the project. This should align with your needs and expectations.
- Warranty and Guarantees: Ask about the warranty or guarantee provided for their work. Understand what is covered and for how long.
- Materials and Supplies: Discuss how they handle the sourcing and supply of materials. Ask about the specific flooring products they’ll be using.
- Additional Costs: Inquire about any hidden or additional costs, such as material transport or disposal fees.
- Payment Terms: Discuss payment arrangements and schedules to ensure a smooth transaction process.
Common Red Flags to Avoid
Recognizing red flags during the selection process can help you avoid potential problems and ensure a successful installation.
- Lack of Transparency: Avoid installers who are vague or unwilling to provide clear answers to your questions.
- Poor Communication: A lack of communication or responsiveness to your concerns should be a warning sign.
- Unrealistic Promises: Be cautious of installers who make promises that seem too good to be true, as they often indicate potential issues.
- Poor Reputation: Check for a history of complaints or negative reviews from previous customers. Investigate thoroughly.
- High-Pressure Sales Tactics: Be wary of installers who pressure you into making a quick decision without adequate time for research and comparison.
Types of Flooring and Their Installation

Source: genieflooringinc.com
Choosing the right flooring for your home involves more than just aesthetics; it also impacts your comfort, durability, and long-term maintenance. Understanding the various types of flooring and their installation procedures is crucial for making an informed decision. Different flooring materials have unique characteristics, affecting everything from the ease of installation to the overall cost.
Flooring installation requires careful planning and execution, considering factors such as the subfloor preparation, the specific tools needed, and the maintenance requirements of each type. This section will guide you through the key aspects of installing different flooring types, from hardwood to tile, helping you weigh the pros and cons of each material.
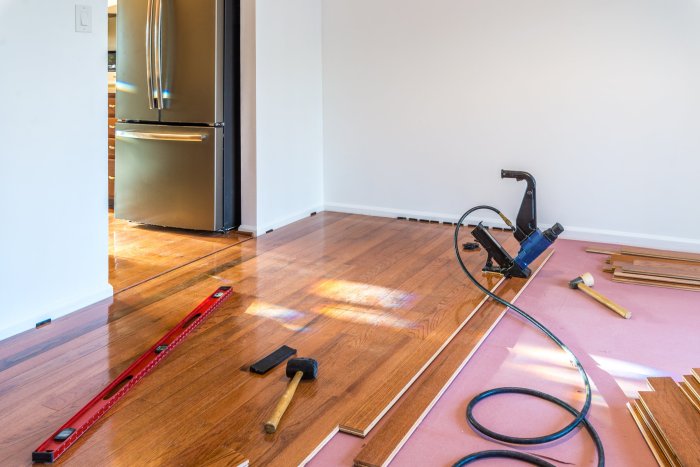
Hardwood Flooring Installation
Hardwood flooring is a classic choice, known for its beauty and durability. However, its installation can be more complex than some other options. Proper subfloor preparation is critical for a stable and long-lasting installation. This includes ensuring the subfloor is level, clean, and free of any imperfections. Installing hardwood requires specialized tools like a flooring nailer or stapler, depending on the chosen method. Precise measurements and careful cutting are essential to avoid issues with fitting. Maintaining hardwood involves regular cleaning with appropriate products to prevent damage and maintain its luster. Professional installation is often recommended for achieving the best results. Cost can vary significantly depending on the type of wood and the complexity of the installation.
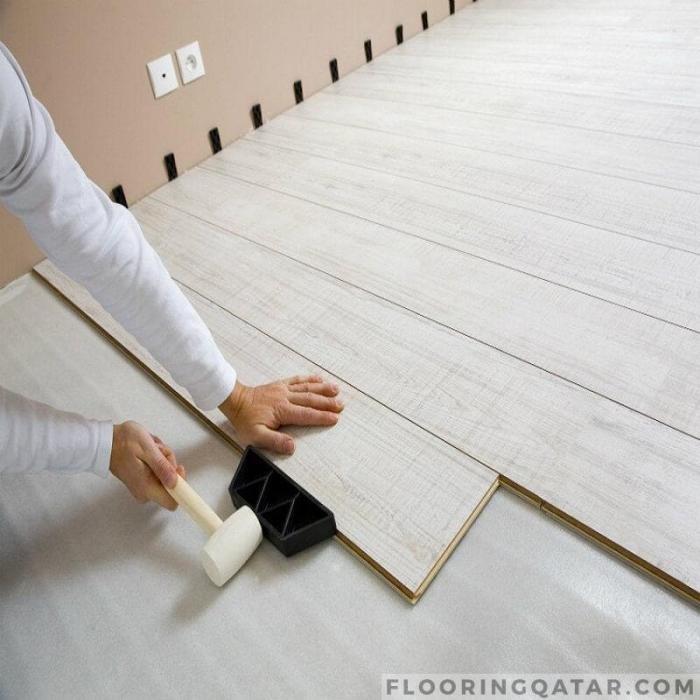
Laminate Flooring Installation
Laminate flooring is a popular, budget-friendly option, mimicking the look of hardwood or other materials. Installation is relatively straightforward compared to hardwood. Laminate planks are typically clicked together, creating a seamless surface. The process often involves preparing the subfloor by ensuring it’s level and clean. Specialized tools are not always necessary; basic hand tools and a measuring tape are often sufficient. Laminate is easier to install than hardwood, leading to potentially lower labor costs. Maintaining laminate flooring involves regular sweeping and vacuuming, along with occasional cleaning with appropriate products. Its resistance to water damage makes it a suitable choice for areas with moderate moisture. This durability often outweighs the lower visual appeal compared to other flooring types.
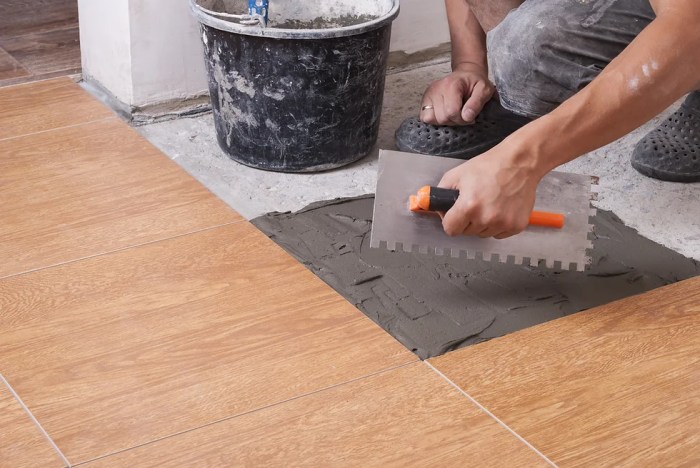
Tile Flooring Installation
Tile flooring offers a durable and aesthetically versatile choice. Its installation process often requires precise measurements, preparation of the subfloor, and careful grouting. Properly preparing the subfloor for tile installation is crucial to ensure the tile adheres well and the floor is level. Specialized tools such as tile cutters, grout, and tile adhesive are necessary for a successful installation. Installation can be time-consuming, requiring careful attention to detail. The cost of tile flooring varies based on the type of tile used and the labor involved. Maintaining tile floors is relatively straightforward, typically requiring regular cleaning and occasional sealing to prevent stains. Tile’s water resistance makes it a popular choice for bathrooms and kitchens.
Vinyl Flooring Installation
Vinyl flooring is a versatile choice, offering various looks and styles. Installation methods vary based on the type of vinyl flooring, but generally involve preparing the subfloor and adhering the vinyl planks or tiles to the surface. It can be a cost-effective choice, especially in areas with moderate moisture. Specialized tools may be needed, such as a vinyl cutter, depending on the type of vinyl being used. Proper preparation of the subfloor and ensuring a level surface are essential for a smooth installation. Maintenance involves regular cleaning and occasional waxing to maintain its luster. Vinyl flooring can be installed in various styles, offering a range of aesthetics.
| Flooring Type | Installation Procedure | Pros | Cons | Tools/Techniques | Maintenance | Cost |
|---|---|---|---|---|---|---|
| Hardwood | Requires precise measurements, specialized tools, and subfloor preparation | Beautiful, durable, long-lasting | More complex installation, higher cost | Flooring nailer/stapler, measuring tape, cutting tools | Regular cleaning, appropriate products | High |
| Laminate | Relatively easy, clicking planks together | Budget-friendly, easy installation, water-resistant | Less durable than hardwood, may not have the same aesthetic appeal | Measuring tape, basic hand tools | Regular sweeping/vacuuming, occasional cleaning | Medium |
| Tile | Requires precise measurements, subfloor preparation, and grouting | Durable, water-resistant, versatile | Complex installation, time-consuming, and can be expensive | Tile cutters, grout, tile adhesive, measuring tape | Regular cleaning, sealing | Medium to High |
| Vinyl | Varied methods, depending on vinyl type; subfloor preparation required | Versatile, budget-friendly, water-resistant, and easy to install | It may not have the same aesthetic appeal as hardwood, but durability varies | Vinyl cutter, measuring tape, adhesive | Regular cleaning, waxing | Low to Medium |
Estimating Costs and Budgeting
Source: flooringqatar.com
Knowing the ballpark figure for your flooring project is crucial. This section will walk you through estimating costs, from materials to labor, and help you create a realistic budget. Understanding the factors influencing costs, along with common hidden expenses, will empower you to make informed decisions.
Average Flooring Costs by Square Footage
This table provides a general estimate of costs for different flooring types, categorized by square footage. Keep in mind these are averages, and actual prices can vary based on specific materials, location, and installer.
| Flooring Type | Installation Cost (per sq ft) – Low | Installation Cost (per sq ft) – Medium | Installation Cost (per sq ft) – High |
|---|---|---|---|
| Laminate | $2 – $4 | $4 – $6 | $6 – $8 |
| Vinyl Plank | $3 – $5 | $5 – $7 | $7 – $9 |
| Luxury Vinyl Tile (LVT) | $5 – $7 | $7 – $9 | $9 – $11 |
| Hardwood (Solid) | $8 – $12 | $12 – $16 | $16 – $20+ |
| Engineered Hardwood | $6 – $10 | $10 – $14 | $14 – $18 |
| Tile | $4 – $8 | $8 – $12 | $12 – $16+ |
Factors Influencing Flooring Installation Costs
Several factors contribute to the total cost of a flooring project. Material costs, labor rates, and the complexity of the job significantly influence the final price.
- Material Costs: Different flooring types have varying material costs. Luxury vinyl tile, for example, typically costs more than laminate. Also, the quality of the material (e.g., hardwood grade) will impact the price.
- Labor Costs: Installation labor is a substantial portion of the total cost. Experienced installers and the complexity of the installation (e.g., stairs, intricate layouts) will affect labor costs.
- Project Complexity: The size and layout of the room, the presence of stairs or other obstacles, and the type of subfloor preparation required all contribute to the complexity of the project and, thus, the installation cost.
- Subfloor Preparation: A crucial but often overlooked aspect. Uneven or damaged subfloors require extra work to level and prepare, adding to the overall cost.
- Additional Services: Demolition of old flooring, removal of debris, and disposal of materials can add to the overall cost.
Calculating Total Project Cost
To calculate the total cost, multiply the square footage of the area to be covered by the average cost per square foot (as estimated in the table). Don’t forget to include the cost of any additional services or materials.
Total Cost = (Square Footage × Average Cost per Square Foot) + Additional Costs
For example, if you need 200 square feet of engineered hardwood flooring, with an average installation cost of $12 per square foot, and additional demolition costs of $100, your estimated total cost would be (200 sq ft × $12/sq ft) + $100 = $2500.
Hidden Costs
Unforeseen expenses can significantly impact the budget. It’s essential to be aware of these hidden costs.
- Unexpected Subfloor Issues: Hidden damage to the subfloor, like rot or unevenness, often requires additional work, increasing the project cost.
- Disposal Fees: Removing old flooring and debris can involve disposal fees, which are often overlooked.
- Permitting Costs: Depending on your location, permits might be required for the installation, adding to the overall cost.
- Material Shortages: Delays or shortages in materials can lead to extra costs and delays in the project.
- Change Orders: Unforeseen changes during the installation process can result in additional costs.
Pre-Installation Considerations: Flooring Installation Near Me

Source: floorscapesneo.com
Getting your flooring installed right involves more than just picking out the perfect tile or hardwood. Careful preparation before the installers arrive is key to a smooth, successful project. This involves meticulous measurements, thorough site preparation, and safety precautions.
Accurate measurements are critical for ensuring the flooring fits perfectly and avoids costly mistakes. Proper site preparation sets the stage for a professional installation, minimizing potential issues. Safety is paramount, and taking precautions safeguards everyone involved in the process.
Accurate Measurement for Flooring
Precise measurements are crucial to avoid costly mistakes. Incorrect measurements can lead to wasted materials, extra labor costs, and potentially damaged flooring. A professional installer will carefully measure the space, accounting for any irregularities or obstacles. They will also provide a detailed layout, ensuring every aspect of the job is planned out meticulously. Using a laser measuring tool, a measuring tape, and a level is standard practice.
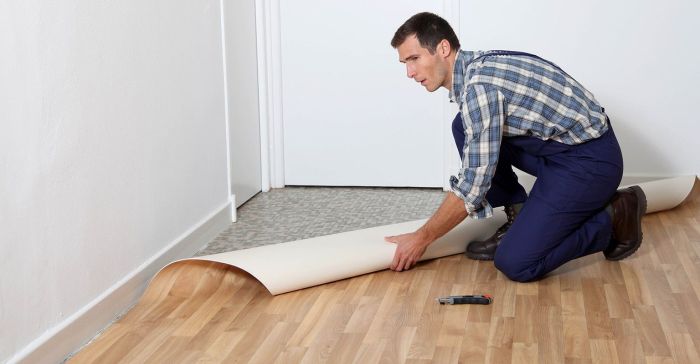
Site Preparation for Installation
Proper site preparation ensures a solid foundation for the new flooring. This involves removing any existing flooring, preparing the subfloor, and ensuring the surface is level and clean. The condition of the subfloor significantly impacts the lifespan and performance of the new flooring. Removing old flooring is often necessary. This may involve removing damaged or worn-out materials, which may need replacing or repairing before new flooring can be installed. The subfloor should be inspected for unevenness, moisture, and other potential issues that could impact the installation.
Accessibility and Safety Considerations
Installation should be performed safely and efficiently, taking into account the layout of the room and the potential for obstacles. Considering accessibility is important, especially in areas with limited space or for people with mobility issues. This includes making sure there’s adequate space for installers to move around and access all areas of the room. Safety measures should be in place throughout the installation process, including the use of appropriate safety equipment. This may include protective gear for the installers, as well as precautions to prevent accidents or injuries.
Questions to Ask an Installer About Site Preparation
To ensure a smooth installation, it’s essential to ask the installer specific questions regarding the site preparation process. These questions will help determine if the installer understands the specific requirements of your project. Here’s a list of critical questions to consider:
- What steps will you take to ensure the subfloor is level and stable? This is vital for preventing issues like squeaking or uneven flooring in the future. An installer should be able to detail the process, such as using shims or leveling compounds.
- How will you handle any existing obstacles, such as pipes or electrical conduits? A professional will be able to provide specific solutions for addressing these issues without causing damage.
- What is your process for removing the old flooring and preparing the subfloor? This includes understanding the type of old flooring, how they will handle the removal and disposal, and any additional steps for subfloor repair. A clear explanation ensures you are aware of the complete process.
- What safety precautions will be taken during the installation process? Safety is critical for both the installers and those in the space. A good installer will explain the steps taken to mitigate risks and ensure everyone is safe.
Installation Process and Timeline
Source: thumbtack.com
Getting your new flooring installed is exciting, but understanding the process and timeline is key to avoiding surprises. Knowing what to expect, from initial prep to the final touches, will help you manage expectations and ensure a smooth installation.
The flooring installation process typically involves several key steps, each playing a crucial role in the final result. Careful attention to detail at each stage ensures a professional and long-lasting installation.
Typical Installation Steps
The installation process isn’t a one-size-fits-all affair. However, most installations follow a similar path, from initial site preparation to final inspection. These steps are crucial to the quality and longevity of the finished product.
- Site Preparation: This involves more than just clearing the area. It includes removing existing flooring, patching any uneven surfaces, and ensuring the subfloor is level and stable. This is vital for a strong foundation for the new flooring.
- Underlayment Installation: Often overlooked, underlayment is a crucial layer that provides cushioning, reduces noise, and improves the overall comfort of the flooring. This step can vary depending on the flooring type, so consulting with your installer is recommended.
- Measuring and Cutting: Accurate measurements and precise cuts are essential for a seamless fit. The installer will carefully measure the area and cut the flooring to the correct size and shape. This step is very important, and mistakes can lead to significant issues.
- Laying the Flooring: This is where the flooring itself is installed. The installer will carefully place each piece, ensuring proper alignment and spacing. Careful attention to detail during this step is key.
- Finishing Touches: This involves tasks like sealing, caulking, and ensuring the edges are properly finished. These small details contribute significantly to the overall aesthetic and durability of the installation.
- Inspection and Quality Control: A final inspection is performed to ensure everything meets standards and the customer is satisfied. This is the last chance for the installer to address any issues.
Typical Installation Timeline
The timeframe for a flooring installation varies greatly based on factors like the type of flooring and the size of the project. Planning is crucial to avoid unexpected delays.
| Flooring Type | Project Size (small/medium/large) | Estimated Installation Time (days) |
|---|---|---|
| Laminate | Small | 1-2 |
| Laminate | Medium | 2-3 |
| Laminate | Large | 3-4 |
| Hardwood | Small | 2-3 |
| Hardwood | Medium | 3-4 |
| Hardwood | Large | 4-5 |
| Luxury Vinyl Plank (LVP) | Small | 1-2 |
| Luxury Vinyl Plank (LVP) | Medium | 2-3 |
| Luxury Vinyl Plank (LVP) | Large | 3-4 |
These are estimates only. Actual times can vary based on the complexity of the project, availability of materials, and unforeseen circumstances.
Potential Delays
Several factors can cause delays in the installation process.
- Material Delays: Unexpected delays in receiving materials from suppliers can significantly impact the timeline.
- Subfloor Issues: Problems with the existing subfloor, like unevenness or moisture, may require extra time for repairs.
- Weather Conditions: Adverse weather conditions can affect the installation process and cause delays.
- Installer Availability: Scheduling conflicts or unexpected emergencies can impact the installer’s availability.
- Complexity of the Project: Complex designs or unusual layouts can extend the installation time.
Managing Installation Timeline Expectations, Flooring installation near me
Open communication with your flooring installer is essential.
- Defined Scope: Discuss the project’s scope, including the area to be covered and any specific requirements, upfront.
- Realistic Expectations: Understand that delays can occur, and have a plan in place to address potential issues.
- Regular Communication: Establish a schedule for communication with the installer to stay updated on the progress and address any concerns.
Post-Installation Care and Maintenance

Source: kitchenhomeandbath.com
Once your new flooring is installed, proper care is key to its longevity. Regular maintenance prevents damage, extends the lifespan of your investment, and keeps your home looking its best. This section details essential cleaning and maintenance tips for various flooring types.
Maintaining your new flooring is like a good relationship – a little effort goes a long way in keeping it happy and healthy. Following these tips will ensure your flooring remains beautiful and functional for years to come.
Cleaning and Care for Different Flooring Types
Different flooring materials require different cleaning approaches. Understanding these nuances is crucial to preventing damage and maintaining the aesthetic appeal of your flooring.
- Hardwood Floors: Regular sweeping and vacuuming are essential. Use a damp mop with a neutral cleaner for occasional spot cleaning. Avoid excessive water or harsh chemicals, which can damage the finish. Never use abrasive cleaners or steel wool. Use a microfiber mop for the best results.
- Laminate Floors: Similar to hardwood, sweep or vacuum regularly. Use a damp mop with a mild cleaner, but avoid soaking the floor. Again, avoid harsh chemicals or abrasive cleaners. Use a damp microfiber mop to prevent water damage.
- Tile Floors: Tile floors are generally very durable. Regular sweeping and mopping with a mild cleaner are sufficient. For stubborn stains, use a specialized tile cleaner. Avoid using abrasive scrubbers or scouring powders.
- Vinyl Plank Floors: These floors are surprisingly resilient. Regular sweeping and vacuuming are ideal. Use a damp mop with a mild cleaner for occasional spot cleaning. Never use excessive water or harsh chemicals.
- Carpet Floors: Vacuum carpets regularly, paying close attention to high-traffic areas. For spills, blot immediately with a clean cloth. Professional carpet cleaning is recommended every few months, especially for high-traffic areas.
Recommended Maintenance Products and Techniques
Choosing the right cleaning products and techniques is critical to maintaining your flooring.
- General Cleaners: Look for neutral, pH-balanced cleaners designed for your specific flooring type. Avoid harsh chemicals, bleach, or abrasive cleaners.
- Specialized Cleaners: For stubborn stains or specific flooring types, consider specialized cleaners designed for those situations. For example, there are cleaners for pet stains and spills. Always test in an inconspicuous area first.
- Cleaning Tools: Use appropriate cleaning tools, like microfiber mops for hardwood or laminate floors, and specialized grout brushes for tile floors. Avoid using abrasive tools that can scratch the surface.
Addressing Potential Flooring Problems
Post-installation, some minor issues might arise. Understanding these common problems and their solutions is key to maintaining your investment.
- Scratches: Scratches are a common issue, especially on hardwood or laminate floors. Minor scratches can sometimes be repaired with a wood filler or touch-up pen. For deeper scratches, consider professional refinishing. Prevent scratches by using appropriate footwear and keeping furniture stable.
- Warped Flooring: Warped flooring is often a result of improper installation or changes in moisture levels. If you notice warping, contact your installer immediately. They may need to adjust the flooring or recommend moisture control measures.
- Grout Issues: Grout stains and discoloration are common on tile floors. Use appropriate grout cleaners and sealers to prevent these problems. Professional grout cleaning might be necessary in severe cases.
Warranty Issues
Understanding your flooring warranty is essential. If issues arise, knowing your rights and responsibilities is crucial.
Consult your flooring warranty carefully. It details the conditions under which the installer is responsible for repairs or replacements.
- Document Everything: Keep records of all communications with the installer, including dates, times, and details of any issues.
- Contact the Installer: First, contact your installer or the company that installed the flooring. Communicate the issue and follow their instructions.
- Seek Professional Help: If the installer is unresponsive or unable to resolve the issue, consult with a consumer protection agency or a lawyer.
Illustrative Examples of Flooring Installation
Source: alaskacountertops.com
Flooring installation projects can vary significantly in scope, materials, and complexity. These examples illustrate successful and less successful installations, highlighting key considerations for each stage of the process. Understanding these examples can help you make informed decisions about your flooring project.
A Complete Flooring Installation Project
This project involved a 1200 square foot living room and kitchen remodel. The homeowners desired a modern, warm aesthetic. The design choice was engineered hardwood flooring in a light oak finish. The installation required careful preparation, including removing the old carpet, repairing subfloor imperfections, and ensuring proper moisture control. The chosen engineered hardwood planks are known for their durability and resistance to moisture, suitable for high-traffic areas.
- Materials: Engineered hardwood planks (1200 sq ft), underlayment, adhesive, caulk, finishing oil.
- Cost Breakdown: Materials ($4,000), labor ($3,500), permits ($150), contingency ($500), totaling $8,150.
- Timeline: 5 days.
A Successful Flooring Installation Project
This homeowner chose a high-quality laminate flooring for their dining room and hallway. The installers meticulously prepared the subfloor, ensuring it was level and free of debris. They carefully measured and cut the planks to avoid any gaps or misalignment. The positive aspects of this project included excellent communication between the installers and the homeowner, a professional and tidy installation, and a finished product that exceeded expectations. Lessons learned included the importance of clearly defining project scope, selecting reputable installers, and maintaining open communication throughout the process.
A Problematic Flooring Installation Project
In this case, a homeowner opted for a budget-friendly vinyl plank flooring. However, the installers did not properly address moisture issues in the subfloor. This resulted in the vinyl planks buckling and warping within a few months. The mistakes made included inadequate subfloor preparation, ignoring moisture concerns, and using inappropriate materials for the environment. Corrective actions included removing the damaged flooring, addressing the moisture problem (installing moisture barriers), and reinstalling the vinyl plank flooring using moisture-resistant materials.
Checklist for a Successful Flooring Installation
A successful flooring installation requires meticulous planning and execution. This checklist helps ensure a smooth and satisfying experience.
- Thorough preparation of the subfloor, addressing moisture concerns and imperfections.
- Accurate measurements and precise cutting of flooring materials.
- Selection of appropriate materials for the specific environment and usage.
- Hiring experienced and reputable flooring installers.
- Clear communication between the homeowner and the installers throughout the project.
- Thorough inspection of the finished product before final payment.
Closing Summary
Source: wixstatic.com
In conclusion, choosing and installing new flooring is a significant home improvement undertaking. This guide has equipped you with the necessary information to find a qualified installer near you, select the right flooring type, and understand the entire process from start to finish. Remember to carefully consider your needs, budget, and preferences throughout the journey. By following the steps in this guide, you can ensure a beautiful, durable, and satisfying flooring installation experience.